

Fingerprinting is a technique that identifies website users based on device or browser settings, such as system fonts, operating system, user agent string, browser extensions, color depth of the screen, and hardware information such as GPU capabilities. Combining these data points, also known as signals, results in a unique pattern or value specific to a browser or mobile device. Fingerprinting techniques include canvas, WebGL, and audio fingerprinting, to name a few.
Fingerprinting has a bad reputation in some circles because it can be used to track personal data without consent for advertising or marketing purposes, but it can also be used for legitimate use cases like fraud detection. Fingerprinting can identify unusual behavior, like when someone tries to impersonate an account. It can also distinguish bots from humans and detect those using virtual private networks (VPNs) or private browsing tabs.
For instance, in credential stuffing, attackers who obtained credentials via a data breach try to break into every account for which they have credentials. In this case, you can verify that the fingerprint is different than those previously seen from a user and ask for more authentication information such as an OTP.
In this article, you'll learn how to generate a browser fingerprint for fraud detection in React and use it to make server-side validations in Node.js. You will allow users to sign up through the React app and register their browser fingerprint during the registration. You will then run validations on this fingerprint, including the following to check if the registration is valid:
- Check if the visitor ID from the request matches that from the server API
- Check if the origin of the request received from the client and the origin registered in the fingerprint match and are in a list of allowed origins
- Make sure the identification was done recently (i.e. within the past few minutes)
- Check if the user might be a bot
You will also restrict users from signing up for too many accounts using the same device in a short period of time.
If the fingerprint is valid, you will register the user in the database and lead them to the dashboard. The app will also have a login page where registered users can sign into the app. When signing in users, you will run the same validations again to check if the visitor ID is genuine and recently generated, if the request is coming from a trusted origin, and if the user might be a bot. If all checks pass, you will sign in the user.
Prerequisites
This tutorial uses Fingerprint's React SDK, which consists of a <FpjsProvider> to interact with the fingerprint API. The component provider is a wrapper that makes the Fingerprint JS agent easy to integrate with your React application.
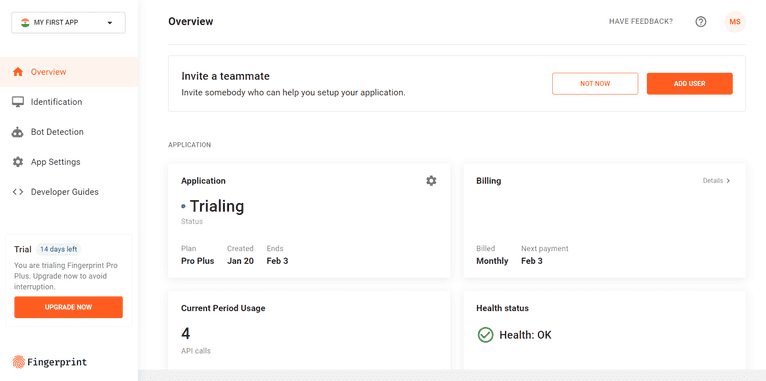
To use the Fingerprint SDK, you need a Fingerprint account with a Pro plan. You can sign up for a free fourteen-day trial without a credit card.
You'll see this dashboard after signing up:
Setting Up React
You'll be using Vite as a bundler for React. It helps you set up a React application and handles JavaScript bundling for you.
Run the following command to initialize a React application using Vite.
npm create vite@latest <folder-name> -- --template reactThis command scaffolds a project structure in your specified <folder-name> directory.
Next, do an npm install after pointing to that directory to install all of the required dependencies:
cd <folder-name>
npm install
Now, install the React router to enable routing in your React project:
npm install react-router-dom localforage match-sorter sort-byTo set up the links to the login and sign-up routes so that users can be authenticated, replace the content in App.jsx with the following:
// App.jsx
import { Link } from "react-router-dom";

function App() {
  return (
    <main>
      <h1>Authentication</h1>
      <Link to={'/signup'}>Sign Up</Link>
      <Link to={'/login'}>Log In</Link>
    </main>
  )
}

export default App
You also need to create routes /signup and /login so that you can point to them just like you did in App.jsx. Create these routes using react-router-dom in main.jsx:
// main.jsx
import React from 'react'
import ReactDOM from 'react-dom/client'
import App from './App.jsx'
import './index.css'

import { createBrowserRouter, RouterProvider } from 'react-router-dom'

import Login from './pages/Login.jsx'
import SignUp from './pages/SignUp.jsx'
import Dashboard from './pages/Dashboard.jsx'

const router = createBrowserRouter([
  {
    path: '/',
    element: <App />
  },
  {
    path: '/login',
    element: <Login />
  },
  {
    path: '/signup',
    element: <SignUp />
  },
  {
    path: '/dashboard',
    element: <Dashboard />
  }
])

ReactDOM.createRoot(document.getElementById('root')).render(
  <React.StrictMode>
    <RouterProvider router={router} />
  </React.StrictMode>,
)
You'll notice that this code imports three pages: <Login />, <SignUp />, and <Dashboard />.
To create these components, create a src/pages directory and create the components in it. You can find the pages in this GitHub repository. These pages use some utilities to handle client-side network requests, which you can find here.
To store the authentication state, you'll use the React Context API. Create a file named AuthContext.jsx inside src/auth/ and add the following code to it:
/* eslint-disable react/prop-types */
import { createContext, useState } from "react";

export const AuthContext = createContext();

const AuthProvider = ({ children }) => {
    const [userData, setUserData] = useState({
        username: null,
        password: null
    })

    const [authenticated, setAuthenticated] = useState(false)

    const signIn = (userData) => {
        setUserData(prev => userData)
        setAuthenticated(prev => true)
    }

    const signOut = () => {
        setUserData(prev => ({
            username: null,
            password: null
        }))
        setAuthenticated(prev => false)
    }

    return (
        <AuthContext.Provider value={{ userData, setUserData, authenticated, signIn, signOut }}>
            {children}
        </AuthContext.Provider>
    );

};

export default AuthProvider;
Then, wrap the router provider with the AuthProvider in main.jsx:
// main.jsx

// ...

import AuthProvider from './auth/AuthContext.jsx'

// ...

ReactDOM.createRoot(document.getElementById('root')).render(
  <React.StrictMode>
    <AuthProvider>
      <RouterProvider router={router} />
    </AuthProvider>
  </React.StrictMode>,
)
Integrating the Fingerprint Pro React SDK
To install the Fingerprint Pro React SDK from the npm registry, run the following command in the terminal:
npm install @fingerprintjs/fingerprintjs-pro-reactMake sure to point the terminal to the root of your project directory.
Once it installs, import the <FpjsProvider> component in the main.jsx file and wrap the <AuthProvider> component with it:
// main.jsx

// ...

import { FpjsProvider } from '@fingerprintjs/fingerprintjs-pro-react'

// ...

ReactDOM.createRoot(document.getElementById('root')).render(
  <React.StrictMode>
    <FpjsProvider loadOptions={
      {
        apiKey: import.meta.env.VITE_FPJS_API_KEY,
        region: import.meta.env.VITE_FPJS_REGION
      }
    }>
      <AuthProvider>
        <RouterProvider router={router} />
      </AuthProvider>
    </FpjsProvider>
  </React.StrictMode>,
)
As part of the loadOptions, you must specify the apiKey and the region that you had set while signing up. You can create a .envfile at the root of your project, store the API key there, and refer to it using import.meta.env. Here’s what you'll need to add in the .env file:
VITE_FPJS_API_KEY=your_public_api_keyYou can use the same .env file to store both server-side and client-side environment variables. While all variables defined in the .env file will be made available to this server environment, only the variables with VITE as a prefix will bemade available to the frontend. Make sure to exclude the VITE prefix from the variable that you do not want to supply to the frontend, such as the secret server key. Example: SERVER_FPJS_API_KEY=your_secret_server_key.
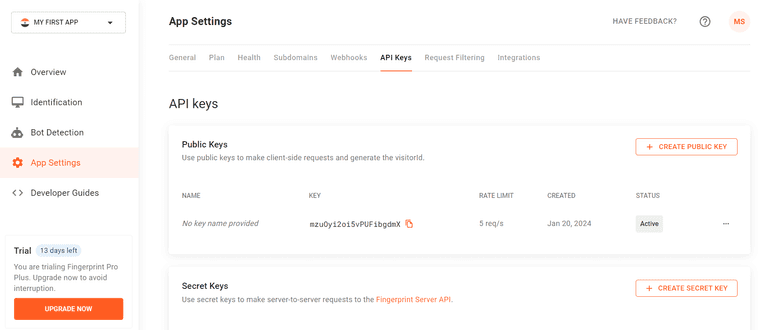
You can get the public API key for your application from the Fingerprint dashboard by navigating to App Settings, selecting the API Keys tab, and locating it under the Public Keys section.
As shown in the code block below, you can use the useVisitorData hook in the AuthContext.jsx file to get the visitor data generated by the SDK. The SDK returns a visitorId that you can use to verify a user's identity. This visitorId is the user's unique fingerprint.
// AuthContext.jsx

// ...

import { useVisitorData } from '@fingerprintjs/fingerprintjs-pro-react'

// ...

export const AuthContext = createContext();

const AuthProvider = ({ children }) => {

    // ...

    const visitorData = useVisitorData({
        extendedResult: true
    }, {
        immediate: true
    })

    return (
        <AuthContext.Provider value={{ userData, setUserData, authenticated, signIn, signOut, visitorData }}>
            {children}
        </AuthContext.Provider>
    );
};

export default AuthProvider;
The useVisitorData hook takes in two arguments—data options and the configuration object. The extendedResult option (extendedResult: true) consists of IP geolocation, incognito mode, and other information along with the default data. This option is set to false by default. Other options include products, linkedId, tag, and timeout.
The immediate: true config option specifies whether the getData() method is called immediately when the component mounts. When it's set to false, you need to call the getData method manually. Setting it to false is useful when you want to fetch the data on an event, such as a user click.
As shown below, when you destructure the items returned from the useVisitorData() hook, you get the state of the request (isLoading) as well as an error property, which is null if there is no error:
const { data, error, getData, isLoading } = useVisitorData()You can use the AuthContext inside any React component with the help of the useContext() hook provided by the context API in React. This is a great way to pass the visitor's data to any component in your application:
// ...
import { AuthContext } from '../auth/AuthContext'

const Component = () => {
    const { userData, setUserData, signIn, authenticated, visitorData } = useContext(AuthContext)
    const { data, error, isLoading } = visitorData

    // ...
}

export default Component
You can find the entire code for the frontend in this GitHub repository.
Setting Up a Node.js Server
When a user visits your site, the frontend SDK will get a visitorId. When a new user signs up, you want to take that ID, pass it to the backend, perform server-side validations, and then store it in your database.
This article uses Fingerprint's Node.js Server API SDK to connect to the API from the backend. (Fingerprint has several other SDKs for various programming languages for backend solutions.)
For spinning up an HTTP server in Node.js, this tutorial uses Express, but you can use any library you prefer. For the database, you will use sqlite3 because it's easy to set up and use locally.
Set up your server with reference to the code in this GitHub repository.
To install the Server API SDK for Node.js, run the following command:
npm install @fingerprintjs/fingerprintjs-pro-server-apiNext, create a client and set the required parameters:
// index.mjs
import {
FingerprintJsServerApiClient
} from '@fingerprintjs/fingerprintjs-pro-server-api'
const fpjsClient = new FingerprintJsServerApiClient({
apiKey: process.env.SERVER_FPJS_API_KEY,
region: process.env.FPJS_REGION
})
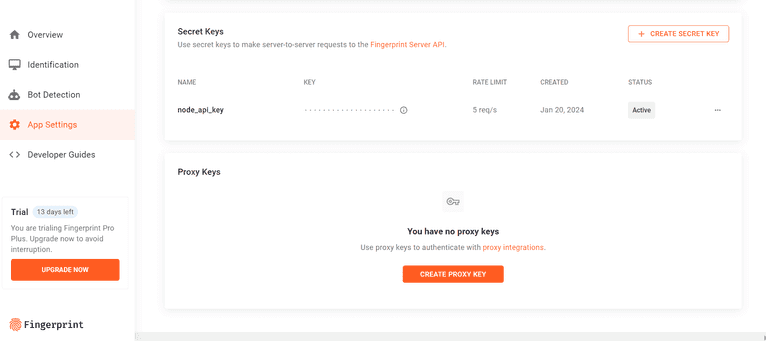
// ...Note that the API key mentioned above is not the same as your public key for the frontend SDK. To get the server API secret key, go to Dashboard > App Settings > API Keys > Secret Keys.
As shown below, set up the sign-up endpoint that gets called when the user signs up, and use the data provided by the Fingerprint Node.js Server API SDK for performing server-side validations:
// file: index.mjs
app.post('/users/add', async (req, res) => {
    const hash = bcrypt.hashSync(req.body.password, 5);

    try {

        const visitorId = await validateVisitor(req)

        const thirtyMinutesAgo = new Date(Date.now() - 30 * 60 * 1000); // 30 minutes ago
        const MAX_ALLOWED_SIGNUPS = 3

        // Check if the number of signups with this visitorId are within the set limits
        const existingUsersForVisitorId = await new Promise((resolve, reject) => {
            db.all(`select * from users where visitor_id = $visitorId AND created_at > $thirtyMinutesAgo;`, {
                $visitorId: visitorId,
                $thirtyMinutesAgo: thirtyMinutesAgo.valueOf()
            }, function (err, rows) {
                if (err) {
                    reject(err)
                }
                resolve(rows)
            })
        })

        if (existingUsersForVisitorId.length >= MAX_ALLOWED_SIGNUPS) {
            throw new Error('You have exceeded the maximum number of signups allowed every 30 minutes!');
        }

        // Check if the given username already has an account
        const existingUsersForUsername = await new Promise((resolve, reject) => {
            db.all(`select * from users where username = $username;`, {
                $username: req.body.username,
            }, function (err, rows) {
                if (err) {
                    reject(err)
                }
                resolve(rows)
            })
        })

        if (existingUsersForUsername.length !== 0) {
            throw new Error('User with this username already exists!');
        }

        // Create the account
        await new Promise((resolve, reject) => {
            db.run(`insert into users values($id, $username, $password, $visitorId, $createdAt);`, {
                $id: crypto.randomUUID(),
                $username: req.body.username,
                $password: hash,
                $visitorId: visitorId,
                $createdAt: Date.now()
            }, function (error) {
                if (error) {
                    reject(error)
                }
                resolve()
            })
        })
        res.status(200).json({
            success: true,
            message: `Inserted user ${req.body.username}`
        })
    } catch (error) {
        console.log(error)
        res.status(500).json({
            success: false,
            message: `Oops! Failed to sign up. ${error.message}`
        })
    }
})


const validateVisitor = async (req) => {
    const fpjsVisitor = req.body.fpjsVisitor
    const event = await fpjsClient.getEvent(fpjsVisitor.requestId)
    const visitorId = event.products.identification.data.visitorId;
    const visitorOrigin = new URL(event.products.identification.data.url).origin

    // Check if the visitorId has been modified by the client
    if (fpjsVisitor.visitorId !== visitorId) {
        throw new Error('Tampered Visitor ID')
    }

    // Check if the request is coming from a verified origin
    if (
        !(visitorOrigin === req.headers['origin'] &&
            allowedOrigins.includes(visitorOrigin))
    ) {
        throw new Error('Invalid origin!')
    }

    // Check if the visitor identification was done in the last 30 minutes
    if ((Date.now() - event.products.identification.data.timestamp) > 30 * 60 * 1000) {
        throw new Error('Expired request')
    }

    // Check if the user might be a bot
    if (event.products.botd.data.bot.result === "bad") {
        // Additionally, consider throwing a CAPTCHA or MFA to verify the user is human
        throw new Error('Possibly a bot')
    }

    return visitorId

}
In the code above, the user is validated on the basis of the visitorId and the requestId in the validateVisitor function. If the visitor ID from the server SDK does not match the visitor ID from the request, there's a chance that the visitor ID was tampered with on the client.
    // Check if the visitorId has been modified by the client
    if (fpjsVisitor.visitorId !== visitorId) {
        throw new Error('Tampered Visitor ID')
    }
If the origin of the request does not match the origin captured by the browser fingerprinting client library and is not in the list of allowed origins, the request might have been tampered with.
    // Check if the request is coming from a verified origin
    if (
        !(visitorOrigin === req.headers['origin'] &&
            allowedOrigins.includes(visitorOrigin))
    ) {
        throw new Error('Invalid origin!')
    }
Similarly, if the visitor ID is known to be generated more than thirty minutes ago, the sign-up request is treated as expired.
    // Check if the visitor identification was done in the last 30 minutes
    if ((Date.now() - event.products.identification.data.timestamp) > 30 * 60 * 1000) {
        throw new Error('Expired request')
    }
Finally, if the browser fingerprinting library suspects the user might be a bot, you can choose to reject the signup and trigger a bot test such as CAPTCHA.
    // Check if the user might be a bot
    if (event.products.botd.data.bot.result === "bad") {
        // Additionally, consider throwing a CAPTCHA or MFA to verify the user is human
        throw new Error('Possibly a bot')
    }
As mentioned before, you can also use visitor ID to check if multiple users are logging in through the same device. However, restricting each visitor ID to only one sign-up doesn't allow for common scenarios like family members that might share a single device. It makes more sense to set a threshold for the number of account creations that can be associated with a single visitor ID within a specific amount of time.
In the code for the /users/add endpoint above, the MAX_ALLOWED_SIGNUPS variable is used to limit the number of accounts that can be created using the same visitor ID every thirty minutes.
Similarly, set up the login endpoint so that you can run the same validations when a user tries to log in:
// file: index.mjs

app.post('/users/auth', async (req, res) => {
    const { username, password } = req.body
    try {
        const userData = await new Promise((resolve, reject) => {
            db.get(`select username, password, visitor_id from users where username = $username;`, {
                $username: username
            }, function (err, row) {
                if (err) {
                    reject(err)
                }
                resolve(row)
            })
        })

        if (!userData) {
            throw new Error("No user found")
        }

        const visitorId = await validateVisitor(req)

        const passwordVerified = bcrypt.compareSync(password, userData.password)

        if (!passwordVerified) {
            throw new Error('Incorrect password')
        }

        if (userData.visitorId !== visitorId) {
            // Perform some additional checks, such as sending a login link to email or asking a security question
        }
        res.status(200).json({
            success: true,
            message: `Logged in as ${req.body.username}`
        })

    } catch (error) {
        res.status(500).json({
            success: false,
            message: `Failed to log in. ${error.message}`
        })
    }
})
Running the Application
Now that you've set up your project, add the following scripts in the package.json file to run the frontend and the backend apps easily:
{
  "scripts": {
    "app:server": "npx nodemon --watch server/* -e mjs,js server/index.mjs",
    "app:client": "vite",
    "dev": "npx npm-run-all -p app:*",
    // Other scripts below
  },
}
Run the client side of the application by executing the following command:
npm run app:clientYou should see the very basic UI when you hit localhost:3000 on your browser tab:
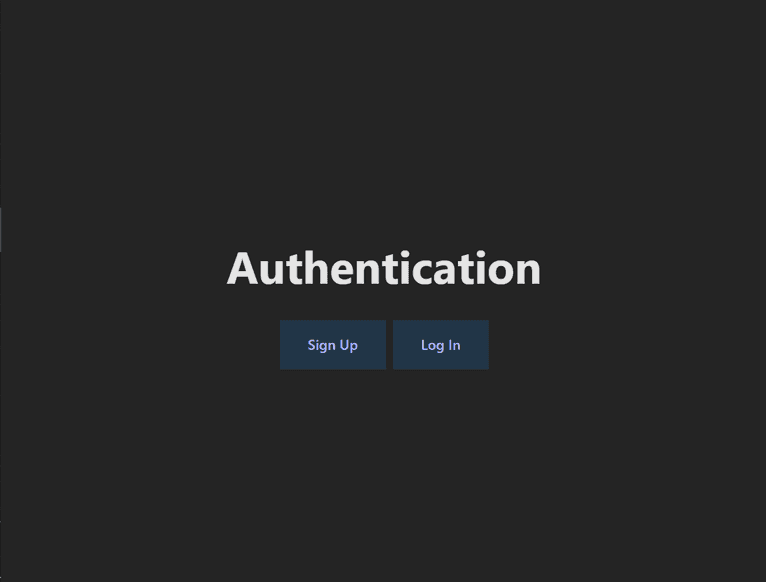
You can customize the style of the application by modifying the index.css file.
To start the server, run the following command in the terminal:
npm run app:serverThe server will start and get exposed on port 5000.
Navigate to the Sign Up page and try to register as a user:

On successful sign-up, you will be redirected to the dashboard page:

If you try to sign up more than three times within thirty minutes from the same device, you won't be able to because of the visitorId validation on the server.
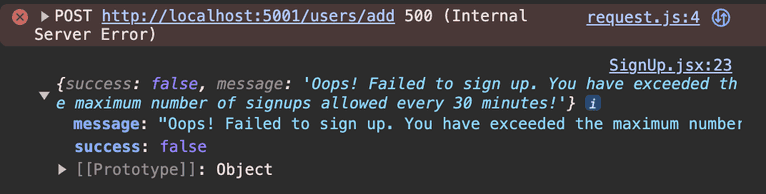
You can also try this in an incognito window. The sign-up would still fail because fingerprinting isn't affected by incognito mode.
You can find the entire code for this tutorial in this GitHub repository.
Advantages of Fingerprinting
Fingerprinting offers several advantages over session tracking, HTTP cookies, and IP tracking.
| Fingerprinting | Session Tracking | Cookies | IP Tracking | |
|---|---|---|---|---|
| Doesn't rely on browser storage | ✔ | ❌ | ❌ | ✔ |
| Can't be spoofed | ✔ | ❌ | ❌ | ❌ |
| Works in incognito | ✔ | ❌ | ❌ | ✔ |
Cookies are pieces of information sent by the server to be stored on the client's machine for a specific period of time. The server sends a unique ID to the client, which gets stored as a cookie on its first request. The client then sends the same cookie to the server on subsequent requests. The danger of cookies is that if they are stolen or spoofed, an attacker can access the system. Also, anyone can disable or delete cookies from their browser.
Conversely, browser fingerprints are hard to spoof. Fingerprinting doesn't need to store anything in the browser. (That's why it works even in incognito.) And it's practically impossible for attackers to have the same configuration and browser settings as your system.
When session tracking is implemented using cookies, it also relies on the browser because cookies are stored in the browser. Session tracking can also be implemented by URL rewriting, where you append a unique session to the request and response URL. The problem with this method is that the unique ID is exposed in the URL. Anyone can easily tamper with it and misuse it to hijack the session. Even though fingerprinting does sometimes use browser storage when it’s available to maximize accuracy, it defaults to other fingerprinting techniques if not. Also, it doesn't expose the visitor ID in the URL.
IP tracking is done by accessing your network's IP address and then extracting location information from it to target personalized ads or other purposes. IP addresses can still be tracked in incognito mode, but IP tracking is not reliable because someone can simply use a proxy server to keep making requests from different IPs. IP rotation—a mechanism where you keep switching IP addresses for your server—is a common practice that can be easily done nowadays.
While fingerprinting captures IP addresses, it supplements this data point with others, such as browser and device settings, to generate a unique pattern, making it more reliable than IP tracking to detect suspicious activity.
Conclusion
This tutorial showed you how to use fingerprinting to prevent sign-up fraud in React with the help of Fingerprint's React SDK.
Fingerprint identifies unique visitors with up to 99.5 percent accuracy. It offers features such as bot detection, device signals, and webhook integration, and it's GDPR/CCPA compliant. Sign up for a free fourteen-day trial of the Pro Plus plan to try it out.
FAQ
Browser fingerprinting is a method to uniquely identify website users by analyzing details about their web browsers to generate an identifier. This information can include details like browser version, screen resolution, and installed fonts to uniquely identify a user's device.
Adding browser fingerprinting to your app can enhance security by detecting and preventing fraudulent activities. It can also be used to improve user experience by enabling personalized settings without requiring logins.
Browser fingerprinting provides a much more persistent form of visitor identification than cookies, which users can easily clear or block. It allows for effective identification and fraud detection capabilities even with stricter privacy settings and cookie restrictions.


